To use an iPhone, turn it on, follow the on-screen setup prompts, sign in with your Apple Account, and configure Face ID, iCloud, and Siri. The whole process takes about 15 to 20 minutes, and the on-screen prompts walk you through every step. Every current iPhone runs iOS 26, so the steps below are the same whatever model you own.
Whether you are a first-time iPhone owner, switching from Android, or upgrading from an older model, the learning curve is short. This guide covers 10 steps to get your iPhone ready for daily use, from first activation to AirDrop, Siri, and the Control Center.
Which iPhone model and iOS version should you choose?
iOS is the operating system that powers every iPhone. It provides the multi-touch interface, built-in apps, and security features that define the iPhone experience. All current iPhones run iOS 26, which Apple released in late 2025 with a redesigned "Liquid Glass" interface and expanded Apple Intelligence features.
Regardless of the model you pick, the setup process and core functionality remain the same. Here are a few options based on different priorities:
- Budget-friendly pick: The iPhone 17e is Apple's most affordable current iPhone, with Face ID, a 48MP camera, and full iOS 26 support. It replaced the older iPhone SE line. Check the live refurbished price before you buy.
- 5G and solid performance: The iPhone 14 or iPhone 15 offer strong cameras and reliable speed at lower refurbished prices.
- Latest technology: The iPhone 17 features the A19 chip, dual 48MP cameras, and 8GB of RAM for full Apple Intelligence capabilities.
All of these models run iOS 26, so they receive the latest security updates and features. For first-time users, any iPhone from the 12 series onward remains a solid choice.
👉 Learn more: How Long Does Apple Support iPhones?
How to use and set up an iPhone as a beginner
These 10 steps cover everything a first-time iPhone user needs to go from unboxing to daily use.
1. Create an Apple Account
Your Apple Account (formerly called Apple ID) is the key to nearly every iPhone feature. You need one to download apps, sync data across devices, use iMessage and FaceTime, and make purchases.
To create your account, go to account.apple.com or follow the prompts during initial setup. You can use any email address as your login.
Once your account is active, you gain access to the App Store, iCloud storage, Apple Music, Apple TV+, and the best email apps for iPhone.
Keep in mind that iCloud sync only works when you are signed in with the same Apple Account on all your devices.
2. Use Quick Start or sync with iCloud
If you already own an Apple device, the fastest way to set up your new iPhone is Quick Start. Place your old iPhone or iPad near the new one, and iOS will offer to transfer your settings, apps, and data wirelessly. The entire transfer takes anywhere from 10 minutes to an hour, depending on how much data you have.
If Quick Start is not an option, sign in with your Apple Account and restore from an iCloud backup instead.
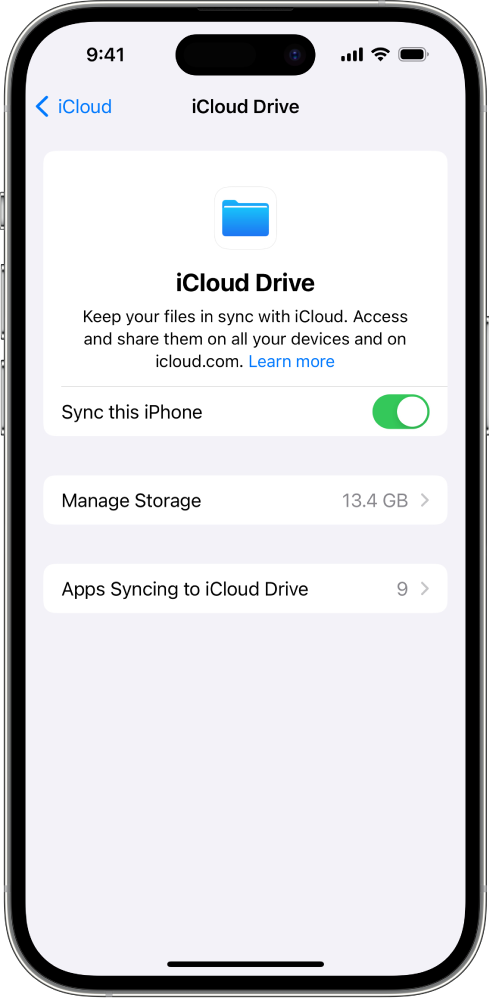
Syncing iPhone with iCloud Drive Image by: Apple
iCloud keeps your photos, contacts, calendars, and documents synchronized across every Apple device linked to your account. Any changes you make on your iPhone appear automatically on your iPad, Mac, or other devices.
3. Set up Face ID and security
Face ID uses a 3D map of your face to unlock your iPhone, authorize purchases, and sign in to apps. The setup takes about 30 seconds: go to Settings > Face ID & Passcode, tap Set Up Face ID, and slowly rotate your head in a circle when prompted.
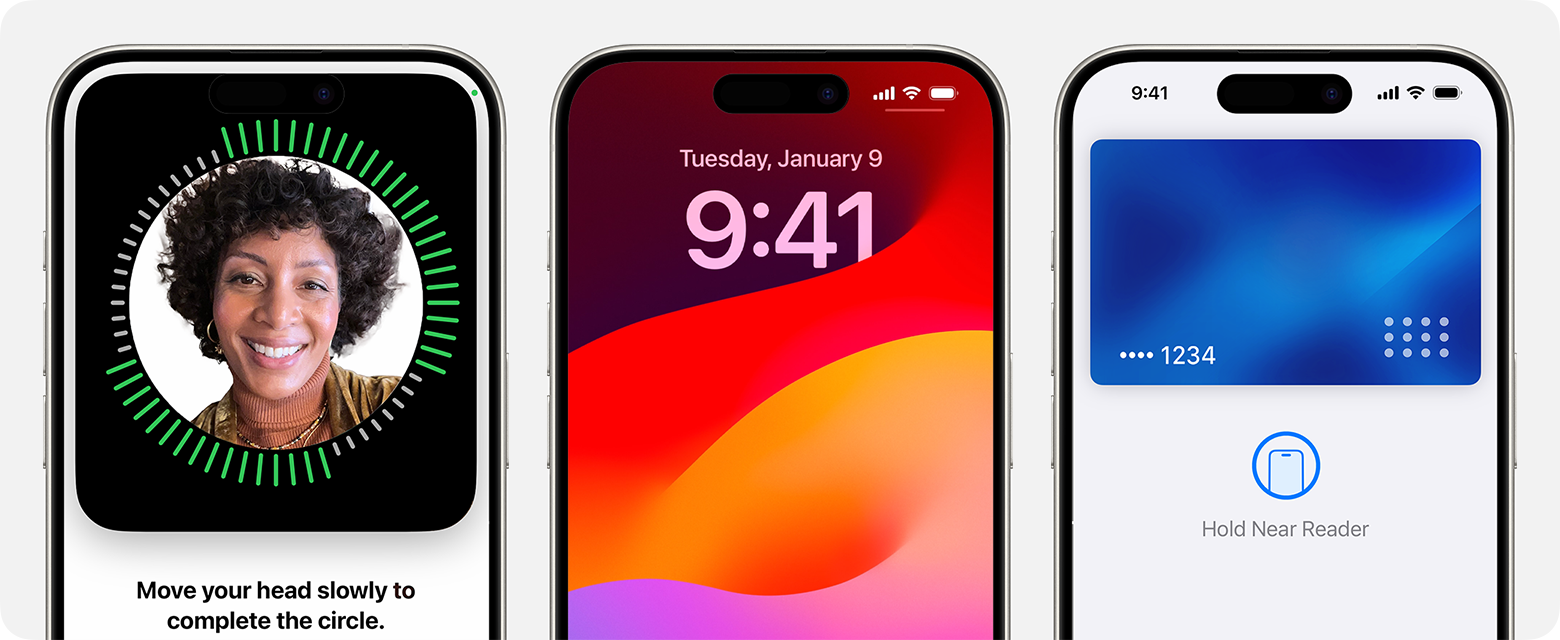
Face ID Image by: Apple
You should also create a six-digit passcode as a backup. For additional protection, enable Find My iPhone in Settings > [Your Name] > Find My so you can locate, lock, or erase your device remotely if it goes missing.
Review your privacy settings in Settings > Privacy & Security to control which apps can access your location, camera, microphone, and contacts.
4. Transfer data from Android
If you are switching from an Android phone, Apple's free Move to iOS app handles the transition. Download it from the Google Play Store on your Android device before starting the iPhone setup process.
Move to iOS transfers your contacts, message history, photos, videos, web bookmarks, email accounts, and calendars. The app creates a private Wi-Fi connection between the two phones, so no data passes through external servers.
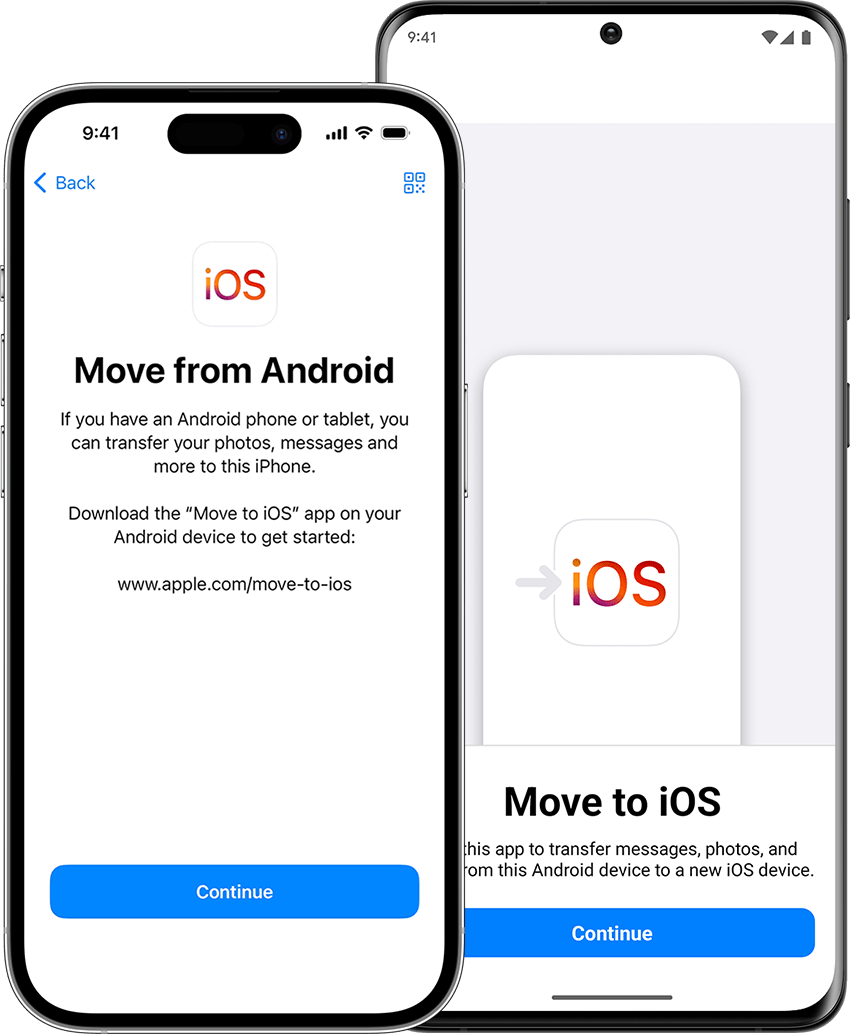
Move to iOS app Image by: Apple
Follow the on-screen instructions on both devices. The transfer typically takes 10 to 30 minutes, depending on how much data you are moving.
5. Learn navigation gestures
Modern iPhones (iPhone X and later) do not have a home button, so navigation relies on gestures:
- Go to the home screen: Swipe up from the bottom edge of the display.
- Switch between apps: Swipe up from the bottom and pause briefly, then swipe left or right to choose an app.
- Open the Control Center: Swipe down from the top-right corner of the screen.
- View notifications: Swipe down from the top-left corner or the center of the screen.
- Reach the App Library: Swipe left past your last home screen page to see all installed apps organized by category.
Apple's built-in Tips app provides short, interactive tutorials on these gestures and other features. New tips are added regularly, so it is worth checking back as you grow more comfortable with your device.
6. Configure the Control Center
The Control Center gives you quick access to your most-used settings without opening the Settings app. On iPhone X and later, swipe down from the top-right corner of the screen to open it.
From here, you can adjust screen brightness, toggle Wi-Fi and Bluetooth, enable Do Not Disturb, activate the flashlight, open the camera, set a timer, and control music playback.
To customize the Control Center, go to Settings > Control Center and add or remove controls. Useful additions include Low Power Mode, Screen Recording, and Alarms.
7. Manage notifications
Swipe down from the top-left corner of the screen to view the Notification Center. Here you will find recent messages, missed calls, calendar events, reminders, and alerts from your apps.
To reduce notification clutter, go to Settings > Notifications and configure each app individually. You can choose between banners, alerts, or silent delivery. Scheduled Summary groups less urgent notifications and delivers them at set times during the day.
8. Adjust display and Night Shift
Night Shift reduces blue light from your display during evening hours, which research suggests can improve sleep quality. You can schedule it to turn on automatically at sunset.
To enable Night Shift, open the Control Center, press and hold the brightness slider, then tap Night Shift. You can also configure it in Settings > Display & Brightness > Night Shift.
For general comfort, explore Settings > Display & Brightness to switch between Light and Dark mode, adjust text size, and enable True Tone, which adapts screen color temperature to your ambient lighting.
9. Set up Siri
Siri is Apple's voice assistant. If you have used Google Assistant on Android, Siri fills the same role on iPhone. It can make calls, send messages, set alarms, play music, open apps, and answer questions.
To activate Siri, go to Settings > Siri and enable voice activation. On iPhones running iOS 17 or later, you can trigger the assistant by simply saying "Siri" rather than the older "Hey Siri" phrase. You can also press and hold the side button to activate Siri silently.
Siri works with compatible accessories too, including wireless earbuds and HomePod speakers.
10. Use AirDrop
AirDrop lets you share photos, videos, documents, and links wirelessly between Apple devices. It uses a combination of Bluetooth and Wi-Fi, so no internet connection is required. Both devices just need to be nearby with AirDrop enabled.
To share a file, open it, tap the Share button (the square with an upward arrow), and select the receiving device from the AirDrop section. You can configure who can send you files in Settings > General > AirDrop, choosing between Contacts Only, Everyone for 10 Minutes, or Receiving Off.
Enhance your iPhone experience with built-in apps
Apple iPhones are known for their ease of use, build quality, and years of software support. Much of that usability comes from the built-in app ecosystem.
Key apps to explore as a beginner include Safari for web browsing, Photos for organizing and editing images, Maps for navigation, Mail for email, and the Health app for tracking fitness data. The smooth gestures and fluid transitions across these apps make the iPhone feel responsive and intuitive.
With iOS 26, Apple expanded home screen customization significantly. You can add resizable widgets to any home screen page, change app icon styles, and organize apps into the App Library automatically. The Shortcuts app also lets you create automations for repetitive tasks.
For iPhones that support it, Apple Intelligence adds on-device AI features including writing tools, photo search by description, notification summaries, and a more capable Siri that understands context across apps.
👉 Learn more: 20 Best AI Apps for iPhone
Refurbished iPhone vs. new iPhone: same features, lower price
New iPhones deliver an excellent experience, but their price tags can be steep. The iPhone 17 starts at $799, and the Pro Max reaches $1,199 before storage upgrades.
A refurbished iPhone offers the same performance and features at a reduced cost. These devices have been returned to full working condition, tested, and typically come with a warranty of at least 30 days. For a first-time iPhone user, a refurbished model is a practical way to try iOS without a large upfront investment.
On RefurbMe, you can compare refurbished iPhone prices across trusted sellers in real time. Back Market usually carries the widest stock and tight pricing, with Amazon Renewed, Gazelle, and others alongside it. Apple's own Certified Refurbished store sits in the same comparison when you want a first-party warranty, so you can weigh price against peace of mind on one page.

64GB storage
Black

64GB storage
Black
👉 Learn more: Best Places to Buy Refurbished iPhones
Frequently asked questions
Takeaway
Setting up an iPhone for the first time is straightforward. Apple's onboarding process guides you through each step, and features like Quick Start and Move to iOS make transferring your data simple regardless of which phone you are coming from.
Once the basics are in place, take time to explore the Control Center, customize your notifications, and try Siri voice commands. These small steps turn a new iPhone from an unfamiliar device into a tool that fits your daily routine.
👉 Related: iPhone 14 vs. iPhone 15
For the best deals on refurbished iPhones, compare prices on RefurbMe across Back Market, Amazon Renewed, Apple, and every other major seller on one page.
Last updated: Jun 17, 2026 · First published: Sep 6, 2024